
Follow Me On Social Media!
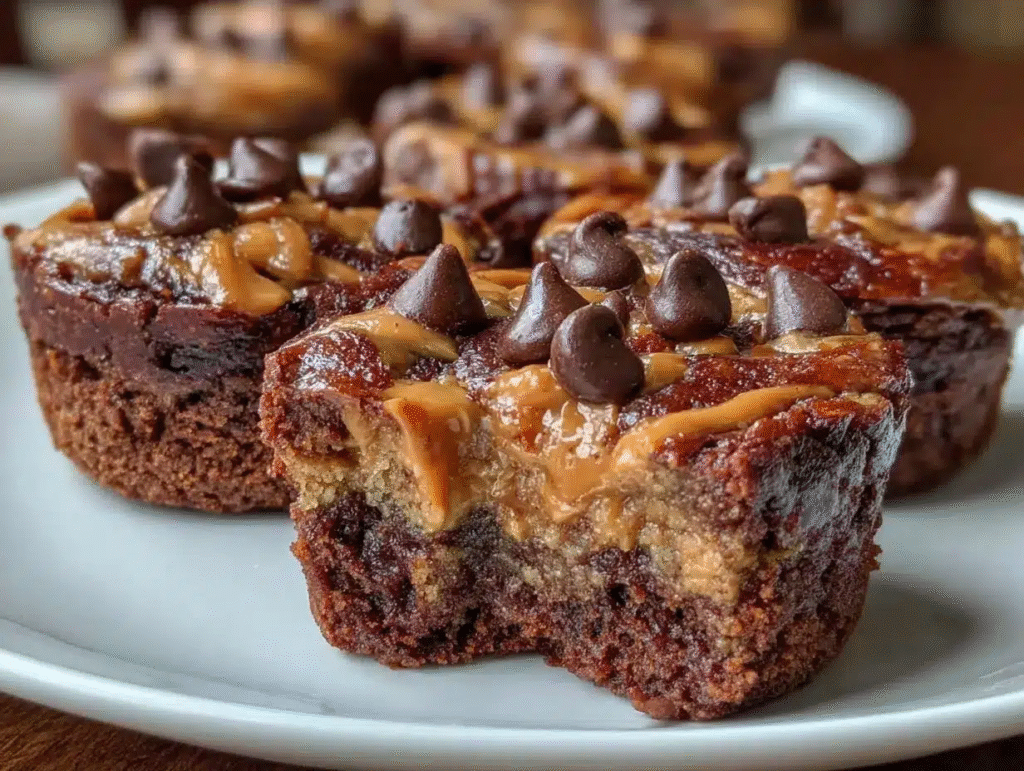
Fudgy Peanut Butter Swirl Protein Brownie Bites
Fudgy Peanut Butter Swirl Protein Brownie Bites are a five-ingredient, high-protein take on the classic brownie — dense, chocolatey mini bites built on a base of chocolate protein powder, cocoa, natural peanut butter, eggs, and maple syrup, finished with a swirl of warmed peanut butter on top before baking. The technique is intentionally minimal: a single bowl, no butter or flour, and a short 10 to 12 minute bake that leaves the centers just slightly underdone for the gooey, fudgy interior that makes these feel genuinely indulgent. At 90 calories and 5 grams of protein per bite, they occupy the rare category of a dessert that is as nutritionally useful as it is satisfying.
Why You’ll Love This Recipe
- Five Core Ingredients, Genuinely Fudgy Result – No flour, no butter, no oil, and no refined sugar are required to produce a brownie bite with a dense, gooey center and set edges — the protein powder, cocoa, and peanut butter do all the structural and flavor work together.
- High Protein in a Dessert Format – Five grams of protein per individual bite means a serving of two or three delivers 10 to 15 grams of protein within a dessert that tastes nothing like a protein supplement.
- Naturally Gluten-Free – With no wheat flour or grain-based ingredients in the base recipe, these are inherently suitable for gluten-free diets without any substitution or modification required.
- The Peanut Butter Swirl Is Both Decorative and Functional – Warmed peanut butter dropped and swirled on top before baking creates visual ribbon patterns while adding a concentrated layer of fat and flavor that keeps the surface moist and rich as the bites cool.
- Versatile Texture Depending on Temperature – Eaten warm from the pan, the centers are soft and gooey; chilled, they firm into a denser, fudge-like consistency — two distinctly enjoyable textures from the same recipe depending on preference.
- Practical for Meal Prep and Lunchboxes – A single batch yields 24 bites that store well at room temperature, in the refrigerator, or frozen, making them one of the more efficient snack-prep investments for the week.
Ingredients You’ll Need
Base
- ½ cup (50g) chocolate protein powder – the primary structure and protein source of the batter; use a whey or plant-based variety with a flavor you enjoy eating on its own, as it is prominent in the finished bite.
- ¼ cup (25g) unsweetened cocoa powder – deepens the chocolate intensity beyond what protein powder alone provides and contributes the slightly bitter edge that makes these taste like real brownies rather than protein bars.
- ⅓ cup (80g) natural creamy peanut butter – provides fat, moisture, and binding structure; natural peanut butter with no added oils or stabilizers produces the best texture, though it should be well-stirred before measuring.
- 2 large eggs, room temperature – bind the batter and contribute to the fudgy, set structure during baking; room temperature eggs incorporate more smoothly and produce a more even crumb.
- ¼ cup (60ml) maple syrup – the sole sweetener; provides natural sugars that caramelize slightly during baking, contributing both sweetness and the characteristic glossy top of a well-made brownie.
Optional but Recommended
- ¼ cup (45g) mini chocolate chips – folded into the batter for pockets of melted chocolate throughout the interior; mini chips distribute more evenly than standard-size chips in a small-format bite.
- ⅛ tsp salt – sharpens and amplifies the chocolate and peanut butter flavors significantly; skip only if using a salted peanut butter, as over-salting at this scale affects every bite noticeably.
- ½ tsp vanilla extract – rounds out the flavor profile with warmth and depth that makes the chocolate taste more complex and less one-dimensional.
Topping
- 2 to 3 tbsp extra natural peanut butter, warmed – microwaved to a runny, pourable consistency so it can be dropped in small dollops and swirled cleanly across the surface of each unbaked bite without sinking or clumping.
Step-by-Step Instructions
Step 1: Prepare the Tin and Preheat — Preheat the oven to 350°F (175°C). Lightly grease all 24 wells of a mini muffin tin with cooking spray, or line each with a small paper liner. Thorough greasing is important — these bites have no flour to create a clean release and will stick to ungreased surfaces.
Step 2: Whisk the Wet Ingredients — In a medium mixing bowl, whisk the eggs and maple syrup together until smooth and slightly frothy, approximately 30 seconds. Add the peanut butter and blend until the mixture is completely uniform with no visible streaks. If the peanut butter is thick and resistant to mixing, microwave it briefly for 15 seconds before adding to loosen it to a more blendable consistency.
Step 3: Incorporate the Dry Ingredients — Sprinkle the chocolate protein powder, unsweetened cocoa powder, and salt over the wet mixture. Stir with a spatula until just combined — stop as soon as no dry pockets remain visible. Overmixing develops structure in the protein powder that toughens the texture and works against the fudgy result; under-mixing by a stroke or two is preferable to over-mixing by any amount.
Step 4: Fold in Optional Add-Ins — If using, gently fold the mini chocolate chips and vanilla extract into the batter with a few slow strokes of the spatula. Distribute evenly without deflating the mixture or continuing to work the batter unnecessarily.
Step 5: Fill the Muffin Wells — Scoop approximately 1 tablespoon of batter into each well of the prepared mini muffin tin, filling each to about three-quarters full. A small cookie scoop or a tablespoon measure produces the most consistent portions across all 24 bites.
Step 6: Add the Peanut Butter Swirl — Microwave the extra 2 to 3 tablespoons of peanut butter for 15 to 20 seconds until it reaches a runny, drizzleable consistency. Drop approximately ½ teaspoon onto the top of each filled well, then drag a toothpick or the tip of a butter knife through the dollop in a figure-eight or spiral motion to create visible swirl ribbons. Do not over-swirl — one or two strokes per bite produces a cleaner, more distinct pattern.
Step 7: Bake — Place the tin in the preheated oven and begin checking for doneness at 10 minutes. The edges should look fully set and pulling slightly away from the tin walls, while the centers should remain just barely glossy — not wet, but not fully matte. This slight underdone appearance in the center is intentional and produces the fudgy texture after cooling; a fully matte, set center indicates overbaking.
Step 8: Cool and Serve — Allow the bites to cool in the tin for 5 minutes — they are too fragile to remove cleanly immediately out of the oven. Transfer to a wire rack and serve warm for a soft, gooey texture, or refrigerate for 30 minutes or more for a firmer, denser, fudge-like result.
Recipe Notes & Tips
- Do Not Overmix After Adding Dry Ingredients – Protein powder, unlike flour, does not require mixing to activate gluten — but excessive stirring compacts the batter and develops a rubbery, dense texture. Stir only until the dry ingredients are just incorporated, then stop completely.
- Pull Them from the Oven Early – The single most common mistake with protein-based baked goods is overbaking. These bites continue to set as they cool in the hot tin during the 5-minute rest, so pulling them when the centers still look slightly underdone is the correct call, not a mistake.
- Warm the Peanut Butter for the Swirl – Cold or thick peanut butter dropped on top of batter will sit as a clump rather than swirling. Warming it to a truly runny consistency is what allows a toothpick to pull it into clean, decorative ribbons.
- Room Temperature Eggs Matter – Cold eggs added directly to natural peanut butter can cause the fat to seize slightly, creating a lumpy batter. Bringing eggs to room temperature before mixing produces a smoother, more uniform result.
- Protein Powder Brand Affects Texture – Different protein powders absorb liquid at different rates. If the batter seems very dry or crumbly before baking, add 1 to 2 teaspoons of water or additional maple syrup and stir briefly to bring it together.
- Mini Chips Over Standard – In a bite this small, a standard-size chocolate chip takes up disproportionate space and can cause structural weak points in the small batter portion. Mini chips distribute across the batter more evenly and produce chocolate in every bite rather than concentrated in isolated spots.
Nutritional Information
- Prep Time: 15 minutes
- Cook Time: 12 minutes
- Total Time: 27 minutes
- Servings: 24 mini brownie bites
- Calories: 90 per bite
- Fat: 2 g (Saturated 0.5 g) | Carbohydrates: 8 g | Fiber: 1 g | Sugar: 5 g | Protein: 5 g | Sodium: 40 mg
Nutritional values are per single brownie bite as written. Adding chocolate chips or extra peanut butter swirl will increase calories, fat, and sugar modestly per serving.
Perfect Pairings
- Cold Milk or Unsweetened Almond Milk – The classic chocolate brownie pairing works just as well here; the fat and mild sweetness of milk tempers the intensity of the cocoa and protein powder for a balanced snack experience.
- Greek Yogurt with Honey – Serving two or three bites alongside a small bowl of plain Greek yogurt adds additional protein and a cooling, tangy contrast that makes the combination feel like a complete, balanced snack rather than a standalone treat.
- Coffee or Cold Brew – The slight bitterness of coffee amplifies the cocoa notes in the brownie bites and makes the natural sweetness of the maple syrup come forward more prominently.
- Fresh Berries – Sliced strawberries or raspberries alongside the bites add brightness, acidity, and a color contrast that elevates a simple snack into a more composed dessert presentation.
Ideal Occasions
- Weekly Snack Meal Prep – A single 27-minute baking session produces 24 individually portioned snacks that require no further preparation throughout the week, covering lunches, post-workout snacks, and evening cravings in one batch.
- Post-Workout Recovery Snack – The combination of protein from the powder and peanut butter with fast-acting carbohydrates from the maple syrup makes these a nutritionally logical choice in the post-exercise window when both macros are beneficial.
- Children’s Lunchboxes – At 90 calories with 5 grams of protein and a familiar chocolate-peanut butter flavor profile, these are a more nutritionally substantive lunchbox treat than conventional cookies or packaged snack cakes.
- Healthy Dessert for Guests – Presented warm on a small plate with a dusting of cocoa powder or a few extra chocolate chips scattered on top, these read as a thoughtfully made dessert rather than a health-food substitute, making them appropriate for casual entertaining.
Storage & Serving Tips
- Room Temperature – Store in an airtight container at room temperature for up to 3 days. Keep away from direct sunlight or heat, which can cause the peanut butter swirl to separate and become oily on the surface.
- Refrigerator Storage – Refrigerate in an airtight container for up to one week. Chilling firms the texture considerably, producing a dense, fudge-like consistency that many people prefer over the softer room-temperature version.
- Freezing – Arrange bites in a single layer on a baking sheet and freeze until solid, then transfer to a freezer-safe bag or container for up to 2 months. Individual frozen bites can be thawed at room temperature in 15 to 20 minutes or warmed briefly in the microwave for 15 seconds.
- Reheating for Gooey Texture – Microwave a refrigerated or frozen bite for 10 to 15 seconds to restore the warm, gooey interior texture. The peanut butter swirl will re-soften and the chocolate chips, if used, will return to a melted state.
Creative Variations to Try
- Vegan Adaptation – Replace the two eggs with two flax eggs (1 tablespoon ground flaxseed mixed with 3 tablespoons water per egg, rested for 5 minutes until gel-like) and use a plant-based chocolate protein powder; the texture will be slightly denser but the fudgy quality is preserved.
- Almond Butter or Cashew Butter Swap – Substitute almond butter or cashew butter for the peanut butter in equal measure for a milder, nuttier flavor profile that pairs particularly well with a touch of almond extract in place of vanilla.
- Double Chocolate – Add 2 tablespoons of mini chocolate chips directly to the batter and another tablespoon pressed into the top of each bite before baking for a more intensely chocolate-forward result with melted chocolate in every layer.
- Mocha Version – Dissolve 1 teaspoon of instant espresso powder into the maple syrup before mixing to introduce a coffee note that deepens the cocoa flavor and creates a mocha profile without any additional ingredients or structural changes.
Troubleshooting Common Issues
- Bites are dry or crumbly – The batter was either overmixed after the dry ingredients were added, or the bites were overbaked past the glossy-center stage. Mix only until just combined and pull from the oven at the 10-minute mark on the first attempt, adjusting from there based on your specific oven.
- Bites are sticking to the tin – The wells were not greased thoroughly enough, or paper liners were not used. Re-grease generously with cooking spray before the next batch, paying particular attention to the bottom of each well where the batter sits heaviest.
- Peanut butter swirl sank into the batter – The batter wells were overfilled beyond three-quarters, leaving insufficient surface resistance for the peanut butter to sit on top. Fill to exactly three-quarters and ensure the peanut butter is warmed to genuinely runny before applying.
- Texture is rubbery rather than fudgy – The protein powder absorbed too much liquid during baking, which occurs with certain whey isolate or casein-based powders. Try reducing the protein powder by 1 tablespoon and replacing it with an additional tablespoon of cocoa powder, or switching to a whey concentrate-based powder which absorbs more gently.
Why This Recipe Works
The fudgy texture of these brownie bites is achieved through the deliberate absence of flour and the careful balance of fat, protein, and moisture in the five core ingredients. Natural peanut butter contributes both fat and protein, acting simultaneously as a binder and a moisture-retention agent — the fat coats the protein and cocoa particles and prevents them from setting too firmly during baking, which is the mechanism responsible for the dense, non-cakey interior. Eggs provide the emulsification and structure that would typically come from a flour-fat-sugar matrix in a conventional brownie, while maple syrup adds hygroscopic sugars that attract and retain moisture within the baked bite.